내 환경
Window 10
GPU : GTX 1060 6GB
목차
1. 아나콘다 환경 생성
2. Nvidia driver 설치 (생략)
3. CUDA Toolkit 설치
4. Cudnn
5. 테스트
1. Anaconda 환경 생성 및 패키지 설치
conda create -n 가상환경이름 python=3.6
conda activate 가상환경이름

#패키지 설치
pip install tensorflow==2.2.0
pip install tensorflow-gpu==2.2.0
pip install pandas matplotlib seaborn scipy
pip install keras==2.2.4
2. CUDA Toolkit 설치
필자는 11.2를 설치했음 -> 10.1로 변경
https://developer.nvidia.com/cuda-toolkit-archive
CUDA Toolkit Archive
Previous releases of the CUDA Toolkit, GPU Computing SDK, documentation and developer drivers can be found using the links below. Please select the release you want from the list below, and be sure to check www.nvidia.com/drivers for more recent production
developer.nvidia.com

3. cudnn 설치
필자는 CUDA 11.x 버전을 지원하는 최신 cudnn을 설치했음 (cudnnv8.9.7) -> v7.6.0으로 변경
https://developer.nvidia.com/rdp/cudnn-archive
cuDNN Archive
Download releases from the GPU-accelerated primitive library for deep neural networks.
developer.nvidia.com

4. 중간점검
압축 폴더 -> cuDNN 디렉터리
.exe 프로그램 CUDA toolkit 파일
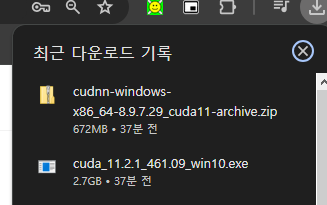
먼저 .exe파일을 실행하여 cuda toolkit을 설치해준다
그 다음 cuDNN 디렉터리를 압축한다.
그러면 다음과 같이 파일이 나타난다

이 친구를 복사할 것이다, 엄밀히 말하면 덮어쓰기 할거다
위치는 다음과 같다 C:\Program Files\NVIDIA GPU Computing Toolkit\CUDA\v11.2


이미 bin, lib 등등 파일이 있는데 덮어쓰기 해준다
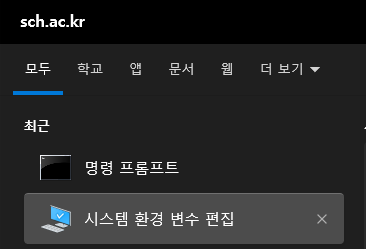
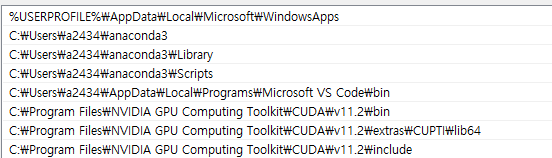
5. 환경변수 설정

Path 더블클릭
아래서부터 3개 경로 추가 (버전에 맞게 수정하면됨)
6. Test
nvidia-smi 가 안뜬다면 아래에 해결 방법을 추가해 놨다!
nvidia-smi
nvcc -V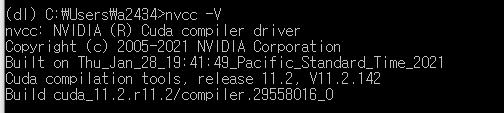
from tensorflow.python.client import device_lib
print(device_lib.list_local_devices())
7. Trouble Shooting
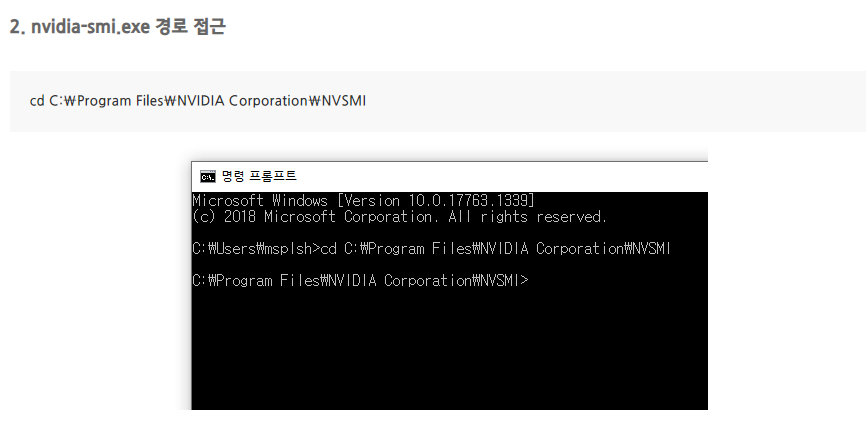
nvidia-smi 했을 때 그래픽 카드가 잡히지 않을 때

<Reference>
https://ingu627.github.io/tips/install_cuda/
https://sanghyu.tistory.com/35

'Deep Learning' 카테고리의 다른 글
| 딥러닝 환경을 구축하며..관련 트러블 슈팅 [ongoing] (1) | 2024.06.11 |
|---|---|
| 로컬 GPU 코랩에 연결하기 (Jupyter notebook) (0) | 2024.06.10 |
| 확률적 경사하강법(SGD), 최적화 (0) | 2024.05.10 |
| [cs231] SGD, SGD 모멘텀, AdaGrad, Adam 7강 (0) | 2024.04.29 |
| [DL] 클러스터링 (0) | 2024.04.25 |


